
Tort cu morcovi si pastarnac
Acum cativa ani cand am auzit prima oara de tort de morcovi, recunosc ca primul meu gand nu a fost unul de incantare. Cumva, eu am crescut cu morcovul doar in mancare, in ciorbe sau tocanite. Scos insa din context, morcovul, precum si alte legume, pot reprezenta o baza excelenta pentru alte deserturi. Am experimentat destul de mult in ultima perioada cu legume si ierburi aromate in deserturi si am ajuns la concluzia ca papilelor mele gustative le place provocarea.

Acest tort de morcovi cu pastarnac e plin de arome interesante: prima data veti simti condimentele (scortisoara, ghimbirul sau alte condimente pe care le folositi in reteta), apoi veti simti dulceata morcovului (mai ales daca folositi morcov de la tara, foarte aromat), si la final pastarnacul. Totul este bine adus impreuna de crema de branza cu unt, aromata intens cu portocala si vanilie. Gustul usor acrisor al cremei este exact ceea ce ii lipseste tortului!

Tort cu morcov si pastarnac
Ingrediente
Blat cu morcov si pastarnac
- 4 oua
- 150 g unt topit
- 90 g ulei vegetal neutru
- 250 g zahar alb granulat
- 100 g zahar brun deschis
- 280 g faina alba 000
- 1 lingurita scortisoara macinata
- 1 lingurita ghimbir macinat
- 8 g praf de copt
- 4 g bicarbonat de sodiu
- 4 g sare
- 300 g morcov ras pe razatoarea mica
- 100 g pastarnac ras pe razatoarea mica
- 40 g stafide
- 40 g merisoare deshidratate
- 50 g nuca de cocos maruntita
- 30 g fulgi de ovaz
Crema de branza cu unt
- 400 g crema de branza (temperatura camerei)
- 230 g unt (temperatura camerei)
- 200 g zahar pudra (cernut)
- 2 lingurite coaja de portocala
- 5 g extract de vanilie
Instructiuni
Blat cu morcov si pastarnac
- Mixati ouale, unul, uleiul si cele doua tipuri de zahar cateva minute pana obtineti un amestec deschis la culoare, pufos.
- Cerneti in bol faina, condimentele, praful de copt, bicarbonatul de sodiu si sarea, apoi omogenizati.
- Incorporati toate celelalte ingrediente ramase, amestecand usor cu o spatula.
- Distribuiti aluatul uniform intre doua tavi de copt de 18cm diametru, tapetate cu hartie de copt.
- Coaceti in cuptorul preincalzit la 170C pentru 45-50 minute sau pana devine auriu si trece testul scobitorii.
- Lasati la racit, apoi nivelati fiecare blat si taiati in jumatate astfel incat sa obtineti doua discuri din fiecare blat – un total de 4 discuri ce mai tarziu vor fi umplute cu crema.
Crema de branza cu unt
- Incepeti prin a mixa untul pana devine spumos si deschis la culoare.
- Adaugati zaharul pudra si continuati sa spumati cateva minute, apoi incorporati coaja de portocala si vanilia.
- Impartiti aceasta crema de unt in doua parti egale. Dati deoparte jumatate din crema pentru a o folosi la decor.
- Amestecati crema de branza cu o spatula pentru a o omogeniza, apoi incorporati usor jumatate din crema de unt facuta mai devreme, obtinand astfel crema de branza cu unt.
- Puneti crema de branza cu unt intr-un pos cu dui rotund si umpleti fiecare strat. Incepeti si finisati cu discurile de blat ce au stat la baza formei, intrucat acelea sunt cele mai drepte.
- Dati tortul la frigider 30 minute, apoi, folosind crema de unt data deoparte mai devreme, imbracati tortul intr-un strat subtire. Acest Prim strat are scopul de a pastra firimiturile pe tort si se numeste crumb coating.
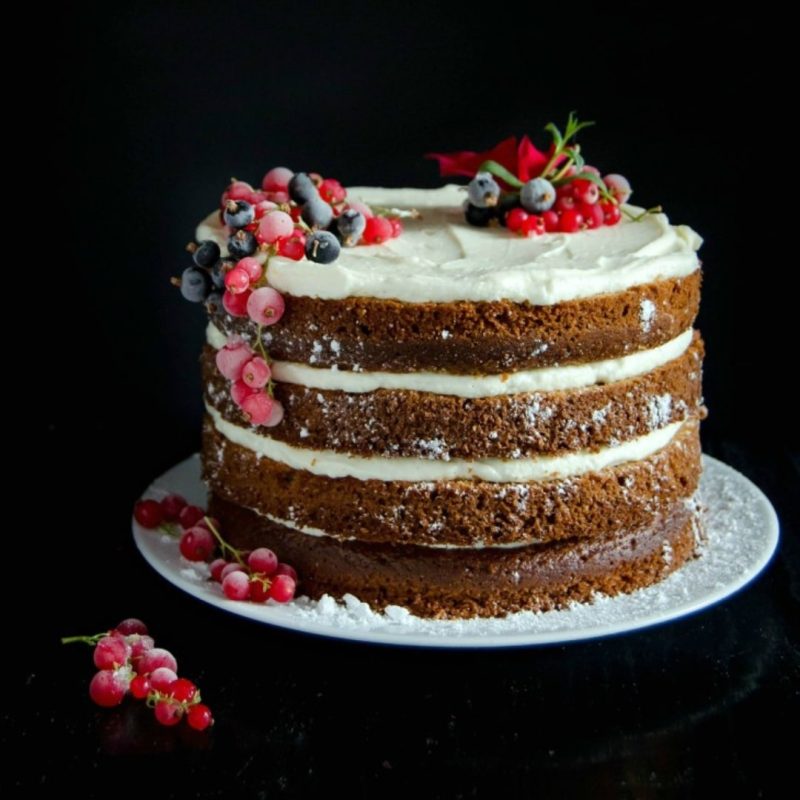
- Dati din nou la rece 30 minute, apoi aplicati un al doilea strat de crema de unt, Nivelati pana obtineti margini drepte si un invelis de crema de unt uniform, dar care permite blatului sa fie partial vizibil.
- Dati la rece minim 8 ore si decorati dupa dorinta.
ENGLISH
If you told me a few years back that I will be baking and actually enjoying carrot cake, I would have said you are crazy. Moreover, adding parsnip to desserts was way out of my mind at that time. I mean, come on, carrot parsnip cake? Is that something you would actually think of during your first weeks of baking?! Surely not!
But the last few months found me actually experimenting a lot with vegetables and herbs in desserts. I actually went beyond the basil you previously saw on my blog and had a lot of fun with rosemary, dill, sage, pepper and parsnip. It’s like my own little world of sweet experiments… with great results if you ask me. My taste buds will strongly approve!

This carrot parsnip cake is surprising! The flavor of the carrot and spices shines through, but then the parsnip kicks in and it reminds you that it is there and you should not overlook it! It’s a very intense and moist cake, a bit different than the other published on my website, especially texture wise. Unlike my first carrot cake recipe (which many readers have said to be the best), or the Momofuku carrot cake, this one is a bit denser. But then again, it has all these goodies incorporated in the batter: rolled oats, shredded coconut, dried fruits, more carrot and grated parsnip. And that has an impact on the taste, but on the texture as well.

The filling is a very basic cream cheese buttercream, flavored with orange to give it a nice kick. It does match well the sponge while being a star on its own. Incredible creamy, yet not too sweet, the filling is a delight!
The decoration of the cake is made of wafer paper flowers which my mother made especially for this occasion. Her newly discovered passion means she gets to work with wafer paper using all sorts of techniques to create this wonderful flowers and foliage.

Watch the video on how to make this carrot parsnip cake below. Enjoy!
Carrot Parsnip Cake
Ingrediente
Carrot parsnip sponge:
- 4 eggs (medium size)
- 150 g butter (melted)
- 90 ml vegetable oil
- 250 g white granulated sugar
- 100 g light brown sugar
- 280 g all-purpose white flour
- 1 teaspoon cinnamon powder
- 1 teaspoon ground ginger
- 8 g baking powder
- 4 g baking soda
- 4 g salt
- 300 g grated carrots
- 100 g grated parsnip
- 40 g dried cranberries
- 40 g raisins
- 50 g shredded coconut
- 30 g rolled oats
Cream cheese buttercream:
- 400 g cream cheese (softened)
- 230 g butter (softened)
- 200 g powdered sugar
- 2 teaspoons orange zest
- 1 teaspoon vanilla extract
Instructiuni
Carrot parsnip sponge:
- Mix the eggs, butter, oil and sugars in a bowl until pale and fluffy – it takes 3-5 minutes.
- Sift in the flour, spices, baking powder, baking soda and salt and mix just until smooth.
- Fold in the rest of the ingredients.
- Scale the batter equally between two 18cm diameter cake pans lined with baking paper.
- Bake in the preheated oven at 170C for 45-50 minutes.
- Allow the cakes to cool down then even the top out. Cut each cake in half to obtain 4 discs of sponge cake. Place aside.
Cream cheese buttercream:
- Mix the butter until pale and light. Add the powdered sugar and keep mixing until fluffy.
- Stir in the orange zest and vanilla extract. Give it a good mix.
- Soften the cream cheese slightly by mixing it. Split the buttercream in half.
- Mix one half of buttercream with cream cheese. Preserve the remaining buttercream to cover the cake later on.
- Place the cream cheese buttercream in a pastry bag fitted with a round nozzle.
- Start layering the cake on a cake board: a disc of sponge, followed by a layer or cream cheese buttercream and so on.
- Once finished, place the cake in the fridge for 30 minutes then start covering it in a very thin layer of buttercream – this is called crumb coating and its purpose is to keep in place all the crumbs of the cake.
- Place in the fridge for 30 more minutes then cover with a second layer or buttercream. Keep working the buttercream until it is smooth and the angles are straight.
- Decorate as you wish!


La reteta in engleza ai trecut brown butter 🙂
Abia astept sa o incerc!
It looks really good!
Thanks for the recipe, I’ll save it!
Mama ml-l prepara cind eram micuta acum 30 de anisori, cum trec anii, acum il prepar eu fetitei mele???